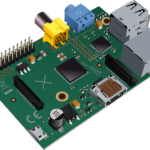
Setting up 4 x Raspberry Pi as a media wall / PiWall
Quick notes on setting up 4 Raspberry Pi’s for a media wall using the PiWall info from piwall.co.uk and the built in tile codes.
Keep in mind that the raspberry pi’s need the network hard wired. I initially tried doing this with WiFi and the displays are so pixelated they are not watchable.
On the raspberry pi’s:
Install Rasbian Lite
log in with pi / raspberry
$ sudo su –
# vi ~/.vimrc
set nocompabile
# systemctl enable ssh
#systemctl start ssh
# vi /etc/network/interfaces
under iface eth0 inet manual add this:
up route add -net 224.0.0.0 netmask 240.0.0.0 eth0
# service network restart
# wget http://dl.piwall.co.uk/pwlibs1_1.1_armhf.deb
# wget http://dl.piwall.co.uk/pwomxplayer_20130815_armhf.deb
# dpkg -i pwlibs1_1.1_armhf.deb
# dpkg -i pwomxplayer_20130815_armhf.deb
To immediately start testing:
# route add -net 224.0.0.0 netmask 240.0.0.0 eth0
and to listen:
# pwomxplayer –tile-code=41 udp://239.0.1.23:1234?buffer_size=1200000B
Where –tile-code=41 (upper left), 42 (upper right), 43 (lower left) or 44 (lower right).
On the player, which could be another Raspberry Pi, or in my case, a Linux Mint machine.
# apt-get install ffmpeg avconv libav-tools
# route add -net 224.0.0.0 netmask 240.0.0.0 eth0
# vi /etc/network/interfaces
under iface eth0 inet manual add this:
up route add -net 224.0.0.0 netmask 240.0.0.0 eth0
# avconv -re -i /path to/video.avi -vcodec copy -f avi -an udp://239.0.1.23:1234
You should see the video playing on all for displays
Now, I also wanted to be able to “cast” (since that seems to be the catch phrase right now) my desktop to the displays as well and here is how I did it. Keep in mind, this turned out to be super laggy, but after using Chrome Cast, it was laggy as well.
# add-apt-repository ppa:maarten-baert/simplescreenrecorder
# apt-get update
# apt-get install simplescreenrecorder
# simplescreenrecorder
When it launches, click continue and create a new profile, give it a name, such as PiWall, click OK, and then Continue.
Set these:
Save as: udp://239.0.1.23:1234
Uncheck Separate file per segment (if it is checked)
Container: other
Container Name: avi
Codec: H.264
Constant rate factor: 38
Preset: ultrafast
Click Continue and then Start recording. If all went well, you shouldn’t receive and error and after 1-2 seconds, you should see your desktop displayed on the PiWall.
In my experience, the quality looked pretty good but you do have a 1-2 second lag. You can mess around with this by changing

 Previous Post