Redundant Backup Storage Device

So, I’ve learned about different network backup storage devices and thought I would give a crack at putting one together using whatever software I can find.
Required Features:
1) Local backup storage (redundant)
2) Sync to cloud storage (offsite)
3) Backup files/folders and complete system images
4) Save images in a format that could be virtualized
Wish List:
1) Easily deployed agents
2) Configure agents from backup device
3) Virtualize system images on backup device
Let’s see how it goes…
Hardware:
1) Because Linux will boot off of software mirrored (RAID1) drives without issues, the initial design will be to use two 2TB hard drives mirrored during installation.
2) Virtualization or not?
a) To allow for local virtualization, you’ll need to have a pretty beefy system. At first, I was looking at quad core processors and 8+ GB of RAM, but it doesn’t really make sense to build such a beefy system that *may* spin up a virtual machine, but will sit idle 99% of the time..
b) So, since Linux is so lean, I’ve decided to go with a cheap dual core processor with only 2GB of RAM. A quick price example would be an AMD A Series APU for $38, Socket FM2+ motherboard for $40, a single 2GB stick of DDR3-1600 for $24, and two 2TB drives for $80 each. That’s $262 for the core components, and then an additional $30 for a cheap computer case with 400W PSU. The reason I don’t include the case and PSU is because you can spend $250 just on that, depending on your tastes.
Installing Linux (With a software RAID1 mirror):
I’ve decided to go with Lubuntu because it is extremely light. I was planning to install using the Lubuntu 14.04 Live CD, but it didn’t give me the options needed to setup a software RAID1 during installation, so I had to download lubuntu-14.04.1-alternate-amd64.iso. I’m also choosing Lubuntu over CentOS because the backup engine I have chosen has a repository for Ubuntu.
You can click next through all the initial screens and choose your keyboard layout, time zone, etc.
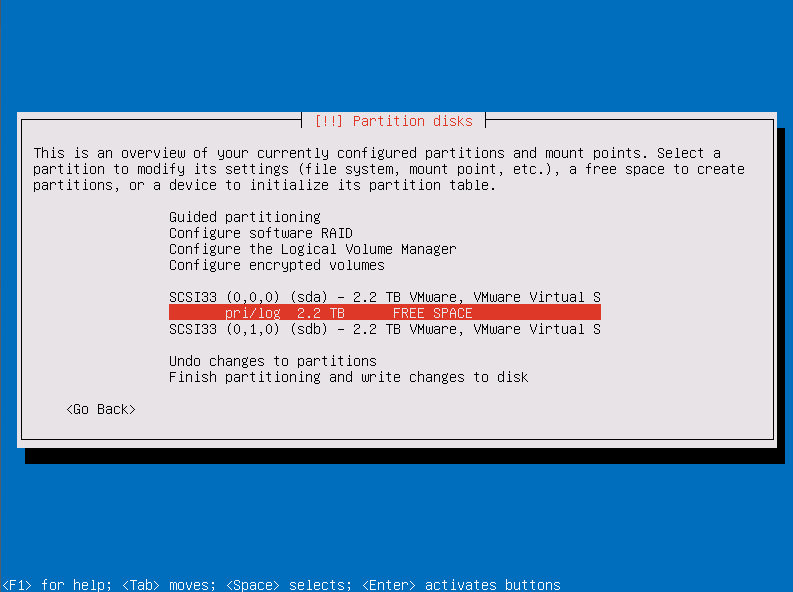
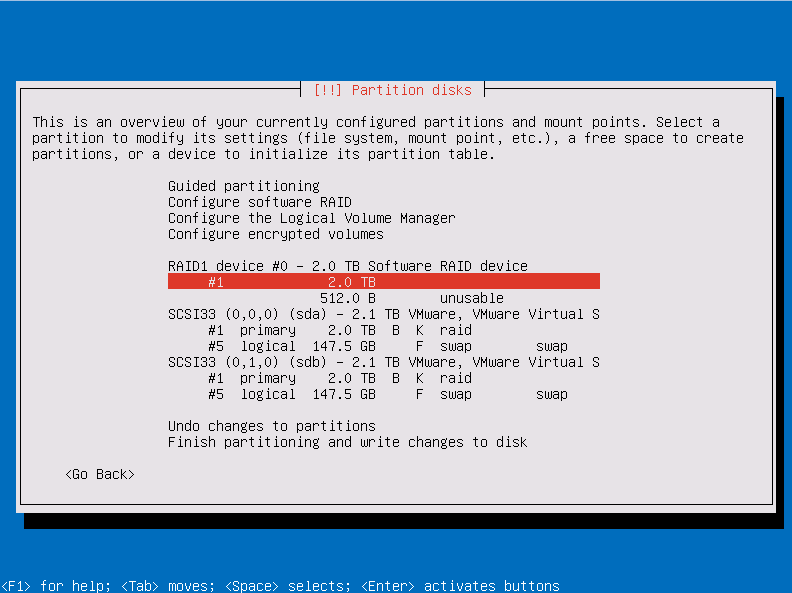
When you get to the “Partition disks”, you want to select Manual

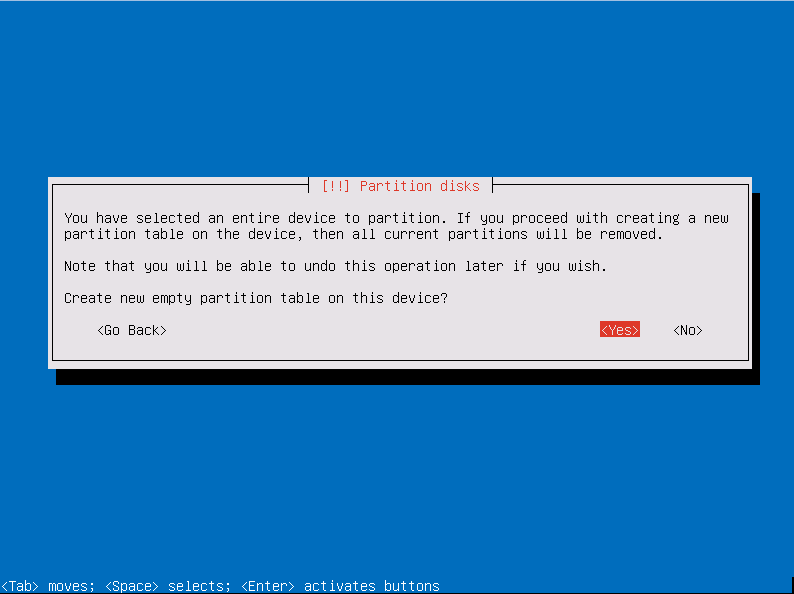
Select your first disk and hit enter, you’ll get a prompt to make sure you want to create a new partition table, select yes
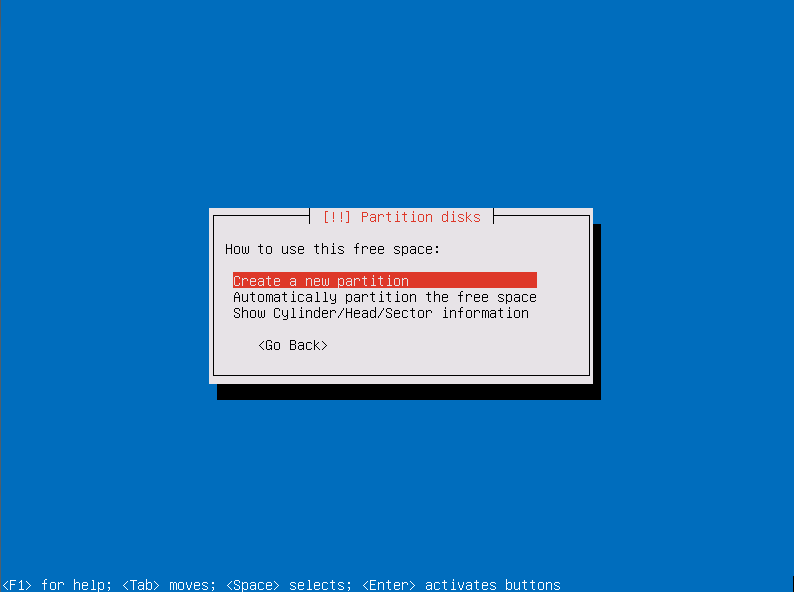
Next, select the “FREE SPACE” and hit enter
Select “Create a new partition”
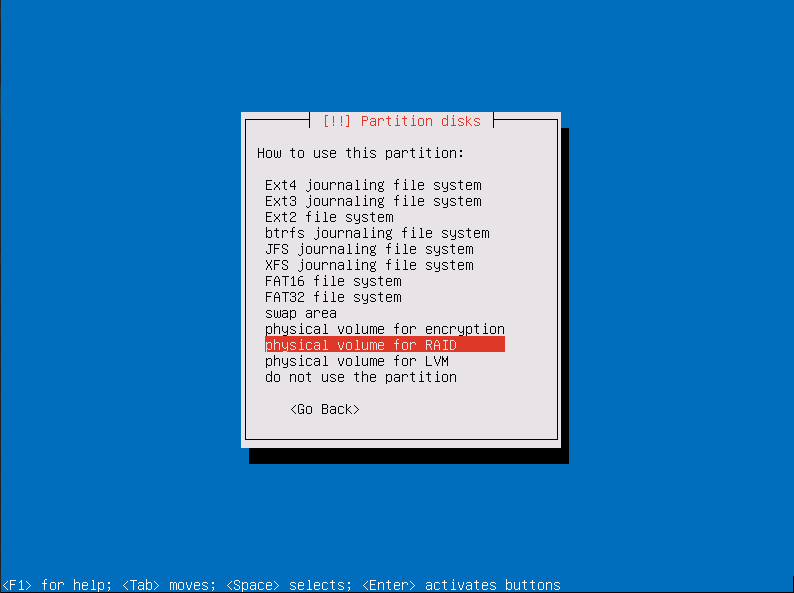
Set it to ~2TB minus the amount of RAM you have and press enter, leave it set as primary and press enter. Next, with “Use as:” selected, press enter.

From the list, select “physical volume for RAID” and press enter.
Then, go down and select “Bootable flag” and press enter, which will change it to “on” and then select “Done setting up the partition”.
Do it again for the second hard disk.
Now, do it again on each disk but set it as a “Swap area” this time.
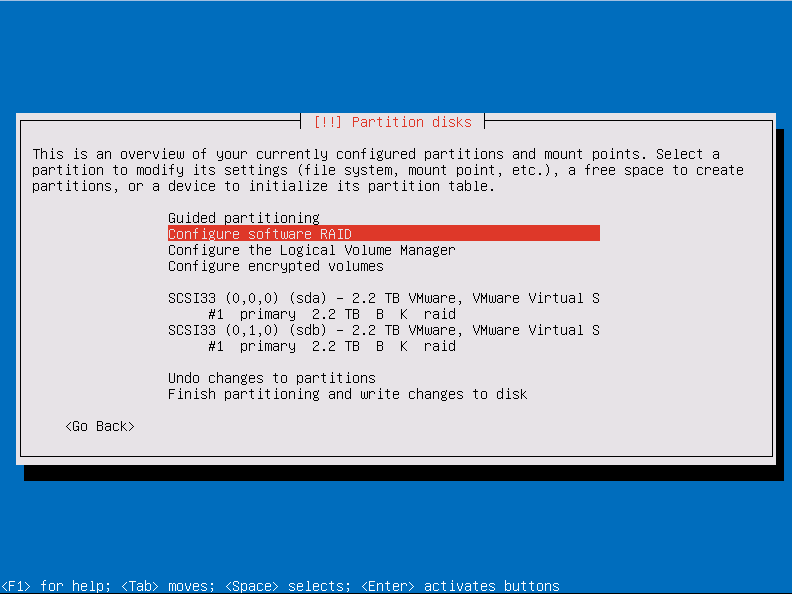
Once both drives have a partition set for RAID, choose the “Configure software RAID” option and say YES to write the changes to disk.
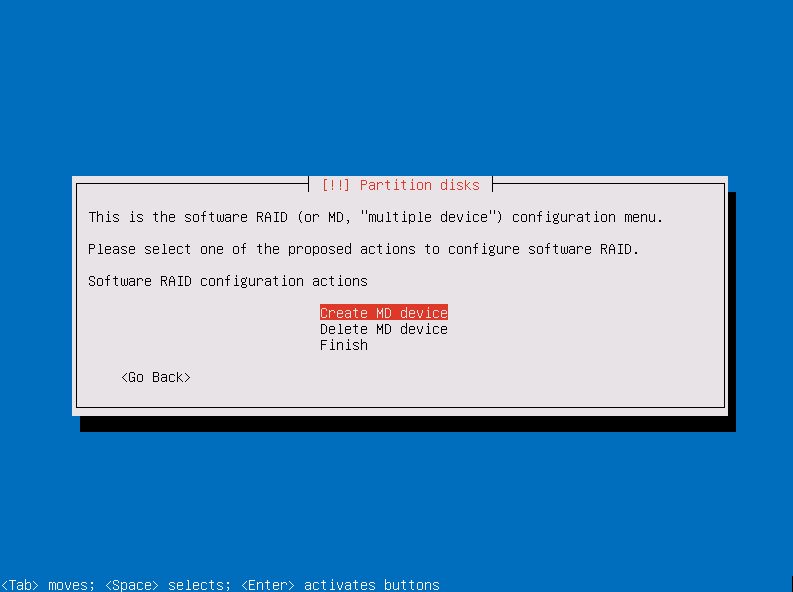
Choose “Create MD device” and press enter.
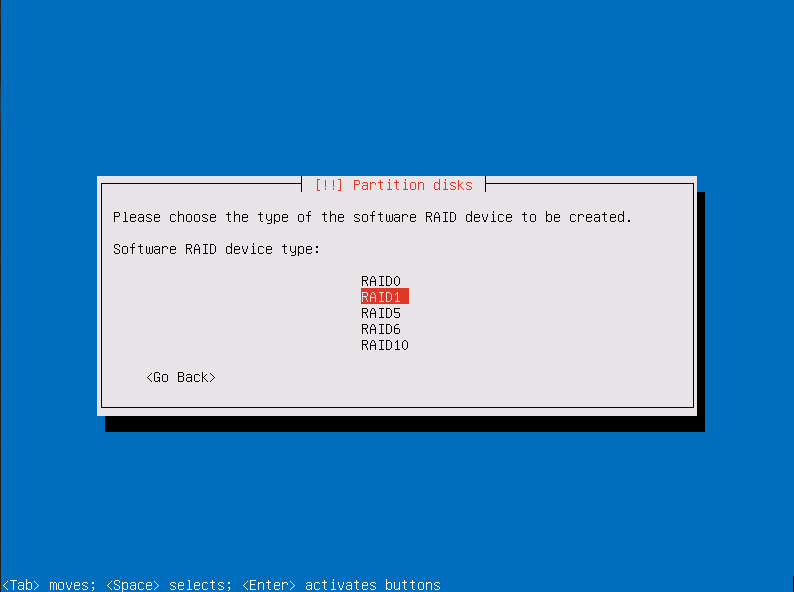
Select RAID1, which is a mirror, and only requires two disks.
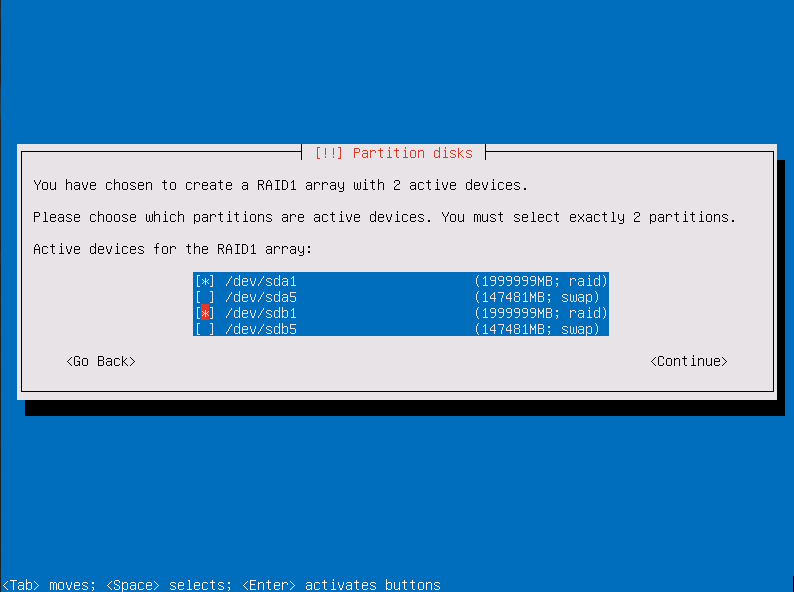
Press enter on the number of active devices (2), Enter again for the number of spare drives (0), and choose each drive by highlighting them and pressing the space bar to put an asterisk.
Now select “Finish” and then choose the #1 RAID device
Select “Use as” and choose “Ext4 journaling file system”.
Select the “Mount point” and set it to “/ – the root file system”

And select “Done setting up partition” and then choose “Finish partitioning and write changes to disk”, and the choose “Yes” to write changes to disks.
At this point, Lubuntu will be installing the base system and we are ready to move onto the next step.
Installing UrBackup
Open a terminal and enter the following:
$sudo su –
#add-apt-repository ppa:uroni/urbackup
#apt-get update
#apt-get install urbackup-server
Might as well upgrade everything while we are at it:
#apt-get upgrade
Now that the backup server is installed, you can browse to it at http://localhost:55414 or from another machine on the network at http://IPADDRESS:55414

Installing agents
Installing a backup agent on windows is extremely easy. You have two options.
With task try icon
If you want a task tray icon that allows you to configure the backup agent on the local machine, which will override any settings made on the server, download it from the UrBackup site here: http://www.urbackup.org/download.html And choose one that doesn’t say “without tray icon”. Once it is installed check backup status page to see if the client shows a “Yes” under Online. Once it does, if the cylinder is still red, right-click on it and select “Exit” and the restart it. For some reason, it seems to get stuck in “Offline” mode, but once you restart it, you’ll have the following options when you right-click on it.
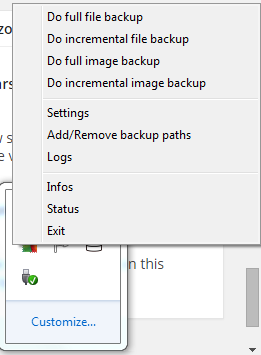
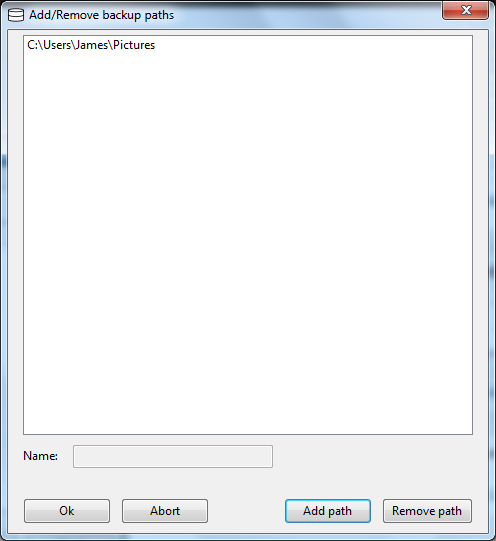
Now, if you plan on just backing up folders and files, right-click on the cylinder icon again and choose Add/Remove backup paths. Click “Add path” and choose the folder/files you want to back up.
If you plan on doing full system image backups, it is setup to do that automatically.
Without task icon
On the status page of the UrBackup site, under the “Internet Clients” section, enter the computer name for the agent to be installed on and click “Add”
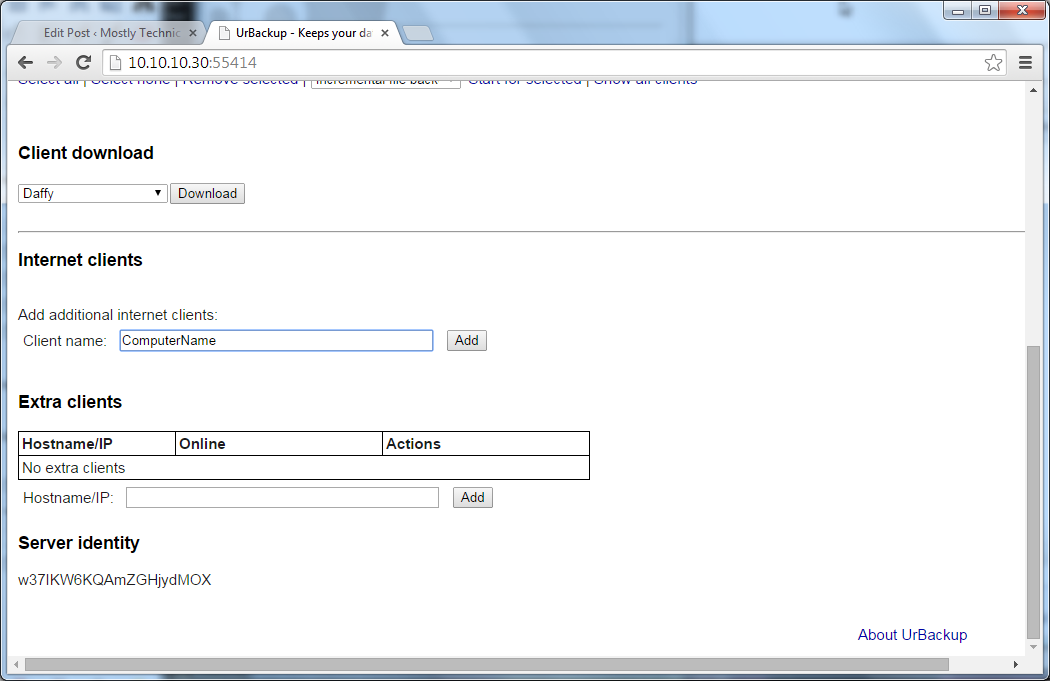
Then, on the computer to be backed up, browse to the UrBackup site, click the dropdown under “Client download” and select the computer name. Hit the “Download” button, save the agent with the computer name in the file name, and install it. Once it is installed, you need to configure it. If you just plan on doing image backups of that machine, it will do that automatically. To make changes to it from the UrBackup website, go to the “Settings” section and click the dropdown at the top that says “Clients” and choose the new computer. Check the box for “Separate settings for this client”. All settings made in this area will now only be for this computer.
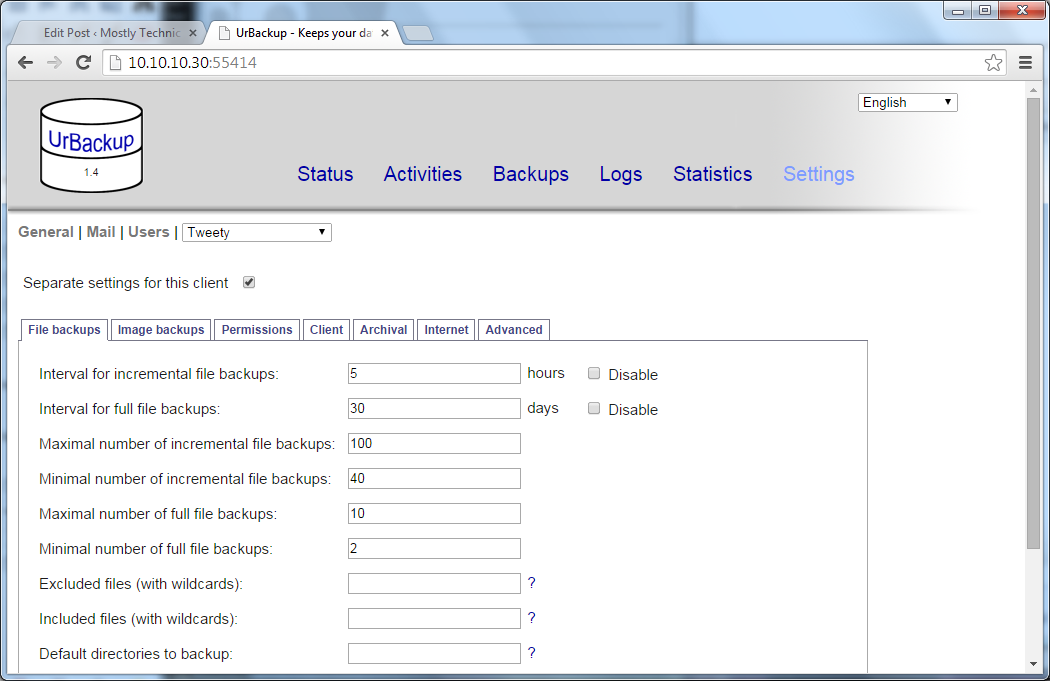
For me, the computers without the task tray icon will only do “Image backups” so I can check the two “Disable” boxes on the “File backups” tab.
That’s all there is to the major part of setting up UrBackup. You can configure how often, how many, etc. backups are pulled.. to see the status of machines currently running backups, just check out the “Activities” section.
Sync to the cloud
To fill this role, we are going to use MEGA. They use encryption, have a Linux sync client, and give 50GB of data storage away for free.. Can’t really complain about that. There may be a better way to do this, so if you know of one, please let me know by leaving a comment.
1) Install TightVNC Server. This will allow us to use a VNC Viewer to connect to the server with a GUI for the ‘urbackup’ user we are going to edit in a few minutes.
$ sudo apt-get install tightvncserver
Next, we need to change the urbackup account to have a bash so we can “su” to it. First, we need our keyboard to work correct with ‘vi’. For each account, we need to do the following, (each account being the user you created during install, root, and urbackup), not that this is required, but it makes things a ton easier.
$ vi ~/.vimrc
press i (insert) to edit the file and type:
set nocompatible
Press ESC and then type :wq (write and quite). Now, when we move around in vi, things will work properly. So, let’s edit the urbackup account.
(the # prompt means you run the commands as root. You can also just use ‘sudo’ instead, but doing ‘sudo su -‘ is much easier when you have a bunch of commands to run as root)
# vi /etc/passwd
Change the urbackup from ‘/bin/false’ to ‘/bin/bash’ and save it (:wq) and then change to the urbackup account:
# su urbackup
$ vncserver
type in a VNC password twice and choose N for a read only password.
$ vncserver -kill :1 (or whatever : that was listed when the server started in the previous step)
$ vi ~/.vnc/xstartup
Delete or put a # in front of /etc/X11/Xsession and add:
/usr/bin/lxsession -s Lubuntu -e LXDE &
$ vncserver
That’s all set. But, the reason we needed to go through all of that, is to download and install the MEGAsync Linux client. So, either log into the machine locally, or using the VNC session we just created
Browse to http://mega.co.nz , Log in, or create an account. Then, download the MEGAsync Linux client listed under “Menu/Apps/Sync Client”, select your distro, 32bit or 64bit, and click the download button. Hit save and let’s install it as root.
# apt-get install libc-ares2 libqt4-dbus libqt4-network libqtcore4 libqtgui4
if you get an error, do ‘apt-get -f install’ and let it complete.
# dpkg -i megasync-xUbuntu_14.04_amd64.deb
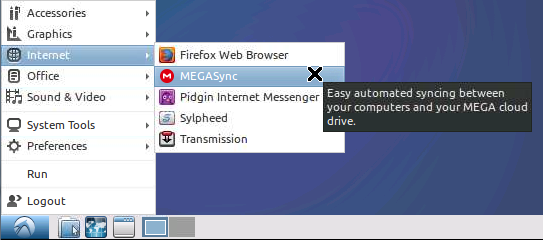
Once it has completed installing, connecting to the machine using a VNC Client on port 5901, you should see “MEGAsync” listed under “Internet” on the program menu.
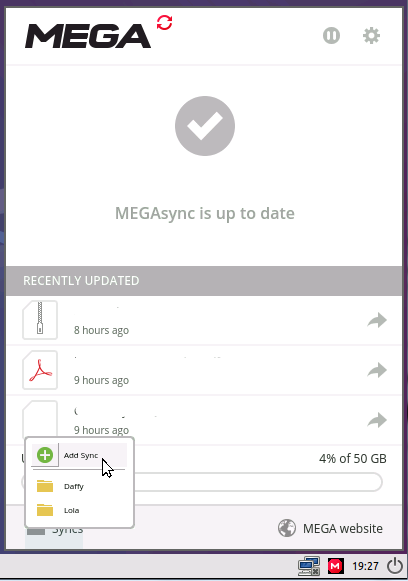
Run it, log into your account, choose “Selective Sync” and set the local sync path to “/media/BACKUP/urbackup/COMPUTER TO SYNC”. Once the MEGAsync client is running, you can left-click on the icon and select “Syncs” in the lower left corner and then “Add Sync” for each computer that you want to sync up to the cloud.
Next, we need to make vncserver auto start for urbackup so that they MEGAsync client will always be syncing new data.
# /etc/init.d/vncserver
press i to insert text and copy/paste the following:
#!/bin/sh -e
### BEGIN INIT INFO
# Provides:          vncserver
# Required-Start:    networking
# Default-Start:     3 4 5
# Default-Stop:      0 6
### END INIT INFO

PATH="$PATH:/usr/X11R6/bin/"

# The Username:Group that will run VNC
export USER="urbackup"
#${RUNAS}

# The display that VNC will use
DISPLAY="1"

# Color depth (between 8 and 32)
DEPTH="16"

# The Desktop geometry to use.
#GEOMETRY="x"
#GEOMETRY="800x600"
GEOMETRY="1024x768"
#GEOMETRY="1280x1024"

# The name that the VNC Desktop will have.
NAME="urbackup-server"

OPTIONS="-name ${NAME} -depth ${DEPTH} -geometry ${GEOMETRY} :${DISPLAY}"

. /lib/lsb/init-functions

case "$1" in
start)
log_action_begin_msg "Starting vncserver for user '${USER}' on localhost:${DISPLAY}"
su ${USER} -c "/usr/bin/vncserver ${OPTIONS}"
;;

stop)
log_action_begin_msg "Stoping vncserver for user '${USER}' on localhost:${DISPLAY}"
su ${USER} -c "/usr/bin/vncserver -kill :${DISPLAY}"
;;

restart)
$0 stop
$0 start
;;
esac

exit 0
press ESC and do :wq to write and quite.
# chmod +x /etc/init.d/vncserver
Then update it using this:
# update-rc.d vncserver 99
now, you should be able to start it like this:
# /etc/init.d/vncserver start
but, let’s reboot the server to make sure it auto starts
# shutdown -r now
Once the system is back up, you should be able to connect to it using a VNC client without doing anything else and verify that the MEGASync app is running and syncing your backup data.
So, let’s see how we did…
Required Features:
1) Local backup storage (redundant) – Using software RAID1, our local data is redundant.
2) Sync to cloud storage (offsite) – Using MEGASync, our data is synced to the MEGA cloud with 50GB of space.
3) Backup files/folders and complete system images – We can backup both files/folders and/or complete system images.
4) Save images in a format that could be virtualized – Well, it does create .VHD (Virtual Hard Disk) images, but each partition is it’s own disk (or something) so we can’t spin them up as a virtual machine. I have to look, maybe there is a way to combine them into a single image for virtualization, but “out of the box” this feature is missing.
Wish List:
1) Easily deployed agents – Just download the agent from the web interface, install, and you are done.
2) Configure agents from backup device – You can either leave the default settings for each client, or custom configure each client from the web interface.
3) Virtualize system images on backup device – Not only can it not virtualize on the backup device, but the .VHD files seem useless except to do a bare metal restore on the original hardware the image was pulled from.